Luminar 3 with Libraries Overview and Special Offer
There is no shortage of Raw photo processing software that can be used to convert your images from Raw to many other formats (TIFF, PSD, JPG, etc.). Examples include Adobe Lightroom, Alien Skin Exposure X4 and Phase One Capture One Pro 12. Most photo processors also have powerful editing capabilities. And one thing I should note is that even if you don’t take photos using the Raw format that your camera may offer as an option, these programs work very well with other formats (even JPGs from smartphones). At their core, most of these programs are what’s known as “non-destructive editors,” which means that no matter what adjustments you make inside the software, you can easily get back to the original version of your images if you like, instead of having to make multiple copies before you begin editing. Lightroom has been my “go-to” application for years, but I’m always interested in seeing what else is out there.
That brings me to an impressive Raw photo processing application called Luminar 3 with Libraries. For the first time, the folks at Skylum have added a Library-based workflow to their application. I recently saw a live demo of the software, and I was very impressed by the speed at which viewing and editing can be done. I also like how easy they make seeing “before and after” effects with the slide of a bar across the screen. They also have some “AI” features and a sky enhancer that can dramatically improve the look of photos very quickly.
Currently, the DAM (Digital Asset Management) and other tools are not nearly as robust as in Lightroom (for example, there is no keyword support and no ability to create virtual copies). However, the folks at Skylum have been working to implement many more features, and to get an idea about what’s in store for the application in 2019 (which includes keywords and virtual copies), visit this page to see their planned roadmap.
I think that the video below by Trey Ratcliff can help you to get a good feel for how Luminar 3 with Libraries is different from other editors, and what its like working with the new Libraries features inside of the application:
For now, I personally will mostly be using Luminar 3 with Libraries to do edits that I feel can be done better (or much faster) than what I can do in Lightroom or another application. Or, I may process specific projects through the application so that I can quickly rate and edit a large number of images. For files that I would like to then manage in Lightroom, I will export my files from Luminar 3 with Libraries to a folder and then import them into Lightroom. If you keep your files managed with a non-destructive editor like Luminar 3 with Libraries or Lightroom, there’s no need to export your files until you need them for another purpose, like sending them to a photo lab for printing.
PRICING, AVAILABILITY AND A SPECIAL OFFER
Pricing for Luminar 3 with Libraries is currently $59 (normally $69). Also, you can save an additional $10 with promo code: IMAGINGBUFFET (look for the link to “Enter Promotional Code” at checkout). Also, unlike many other software companies’ licenses, one license covers 5 Macs or PCs (check their terms for specific details). Satisfaction is also guaranteed, with a 45 Day money back policy. If you currently own Luminar 2018, you are able to upgrade to Luminar 3 with Libraries for no fee. Also check the website for other possible discount offers if you own other products from Skylum Software.
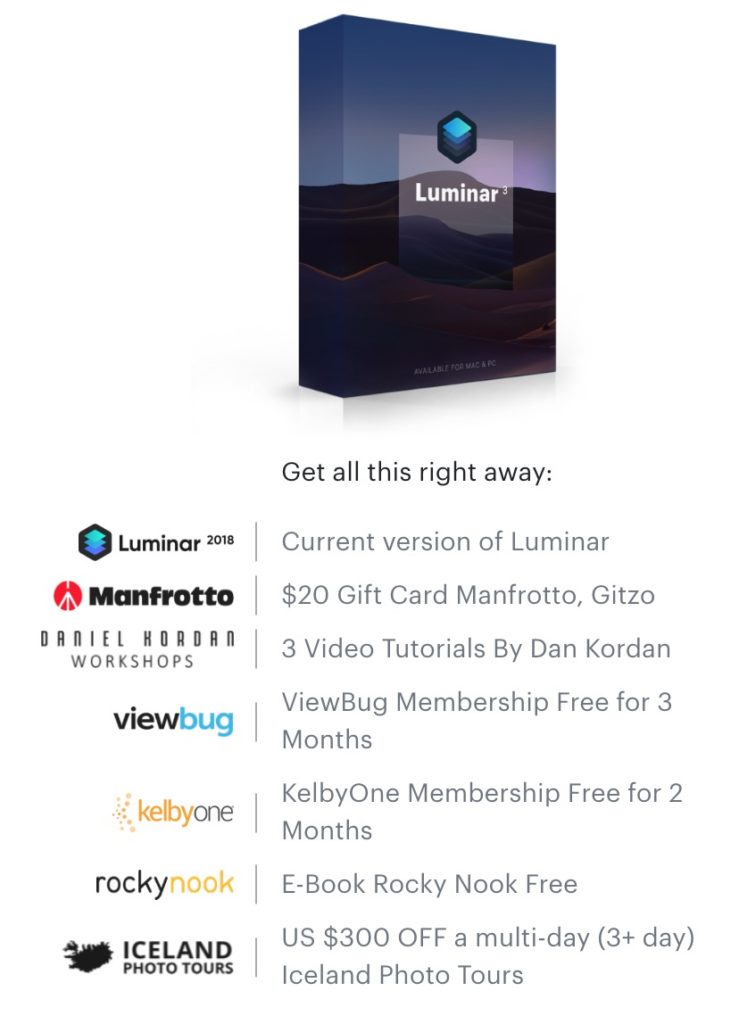
Also, when you purchase Luminar 3 with Libraries by 12/19/2018 at 5AM PST, you will receive all of the bonuses listed below (if you are thinking of taking a trip to Iceland and like the tours offered by Iceland Photo Tours, that bonus alone is very attractive):
For more information and to claim this very special offer, visit THIS PAGE.
I also have two more “Holiday Specials” to share:
1. The folks over at PhotoshopCAFE have a 15% coupon on everything in their store for at least the next four days (the promo code is 5days2018). To see all of the amazing video training they offer, visit this page. I just purchased their Making Movies in Photoshop Video Training. You can find that title HERE.
2. A few years ago, I created a GoFundMe page for my son Tyler’s intensive Autism treatment in Massachusetts. The results have been fantastic (what we learned we use every day, and Tyler has made great progress). As part of the rewards that were offered, two were consulting packages with me so that I can help others with their workflow, camera setup, custom printer profiles, printing (on their own printer or by using an outside service). I’ve decided to make those two packages available again for a limited time (until 12/31/2018). You will be saving $219 off my standard 6 hr rate ($975 for 6 hrs), and $255 off my standard 10 hr rate ($1,495 for 10 hrs). When I sent the offer to my newsletter subscribers, I was asked if I would create a special offer for consulting sessions under six hours, so I am now also offering a two-hour laser-focused session for just $350 (each additional hour is just $162.50; the same as the hourly rate of my 6-hr special consulting special).
To see if we are a good fit for each other, just reserve a no obligation 15 minute Strategy Session with me HERE, and if we decide that we’d like to work together, you can then choose from either consulting option. I’m also happy to create gift certificates for any of my consulting packages (they are 100% refundable if the person who you give the consulting to decides it’s not right for them after we speak for about 15 minutes).
That’s it for now! I wish you and yours a wonderful Holiday Season, and please don’t forget to back up your precious photos and videos.
All the best,
-Andrew
(Full disclosure: I have an affiliate relationship with Skylum Software (makers of Luminar 3 with Libraries), so I will receive a commission if you use my promo code or links above. However, your pricing before any promotional discounts is the same as if you visit their website directly. I have no affiliate relationship with any of the other companies listed above).
DxO Announces Availability of the Nik Collection by DxO 2018 v1.1
I’ve been a longtime user and fan of the Nik Collection. So that’s why I’m happy to see that DxO has continued developing the software after they acquired the rights to develop the software from Google. Prior to Google offering it for no fee for a while (when it was sold by Nik Software), the Collection cost hundreds of dollars, and in my opinion is still worth hundreds of dollars…as long as you use it of course :). The cost of the 2018 v1.1 bundle today is $69.
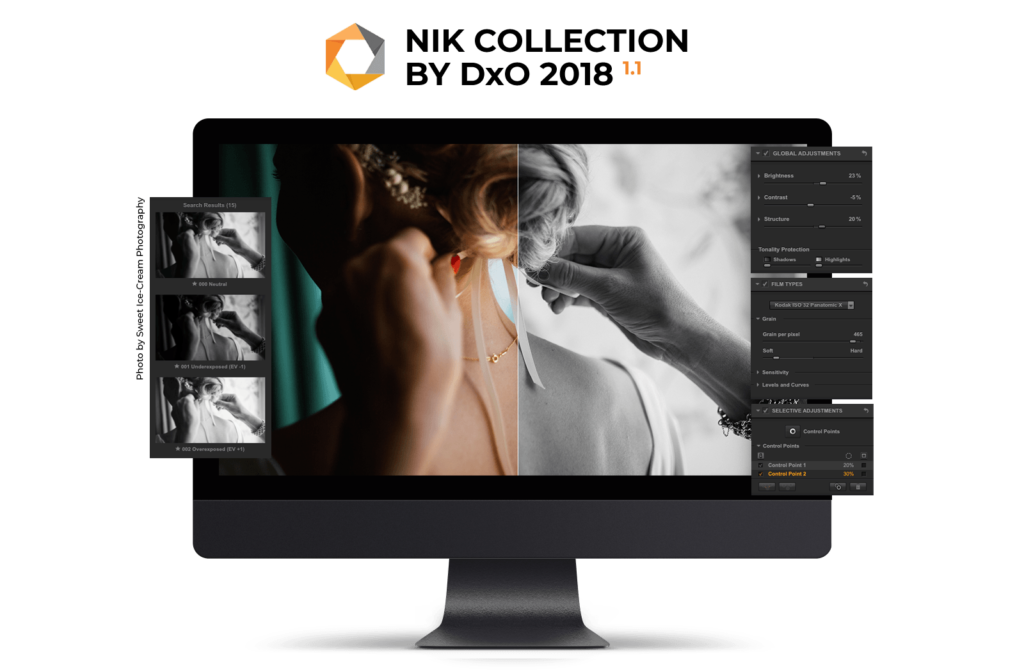
Photo by Sweet Ice-Cream Photography. Graphic courtesy DxO.
Featured in the latest version of the Nik Collection by DxO are the following seven plugins (Descriptions courtesy DxO):
• Analog Efex Pro, a classic lens, camera, and analog film simulator.
• Color Efex Pro, for color corrections, retouching, and creative effects.
• Dfine, which reduces noise in digital images.
• HDR Efex Pro, for editing HDR images.
• Sharpener Pro, for increasing the precision and detail of digital images.
• Silver Efex Pro, a black-and-white converter inspired by dark room techniques.
• Viveza, for locally adjusting color and the tonality of specific areas within the image.
Nik Collection by DxO can be opened with a number of other programs, including DxO PhotoLab 2, Serif Affinity Photo, Skylum Luminar, and other image processing software that features an export menu to a third-party program (or that’s compatible with Photoshop plugins).”
As I mentioned earlier, the cost of the Collection for Mac or Windows users is US $69 (£59 / €69). Users who purchased Nik Collection by DxO after June 2018 may update their software for free, and you can find a free 30 day trial HERE, as well as link to purchase the collection.
SUGGESTED WORKFLOW
I found this page very interesting on DxO’s website regarding a suggested workflow when using the plugins in the Collection. I generally use only one or two of their plugins for any one image, but it can be helpful to see what they recommend. For many more specific tutorials, I recommend entering the specific plugin name and tutorial into the search bar on YouTube.com. Below is one specific video tutorial by Serge Ramelli that covers both Lightroom and Silver Efex Pro that I found particularly good.
Official technical support from DxO for the Collection is available in the following languages:
English
French
Japanese
German
And the software is available in the following languages:
English
French
Italian
Spanish
Japanese
German
Portuguese
Chinese
Dutch
Korean
Polish
Russian
Thai
Turkish
As I noted above, the current cost of the Collection for Mac or Windows users is US $69 (£59 / €69), and users who purchased Nik Collection by DxO after June 2018 may update their software for free. You can find a free 30 day trial HERE, as well as link to purchase the Collection.
Alien Skin Software’s Exposure X3 Overview and News on Exposure X4
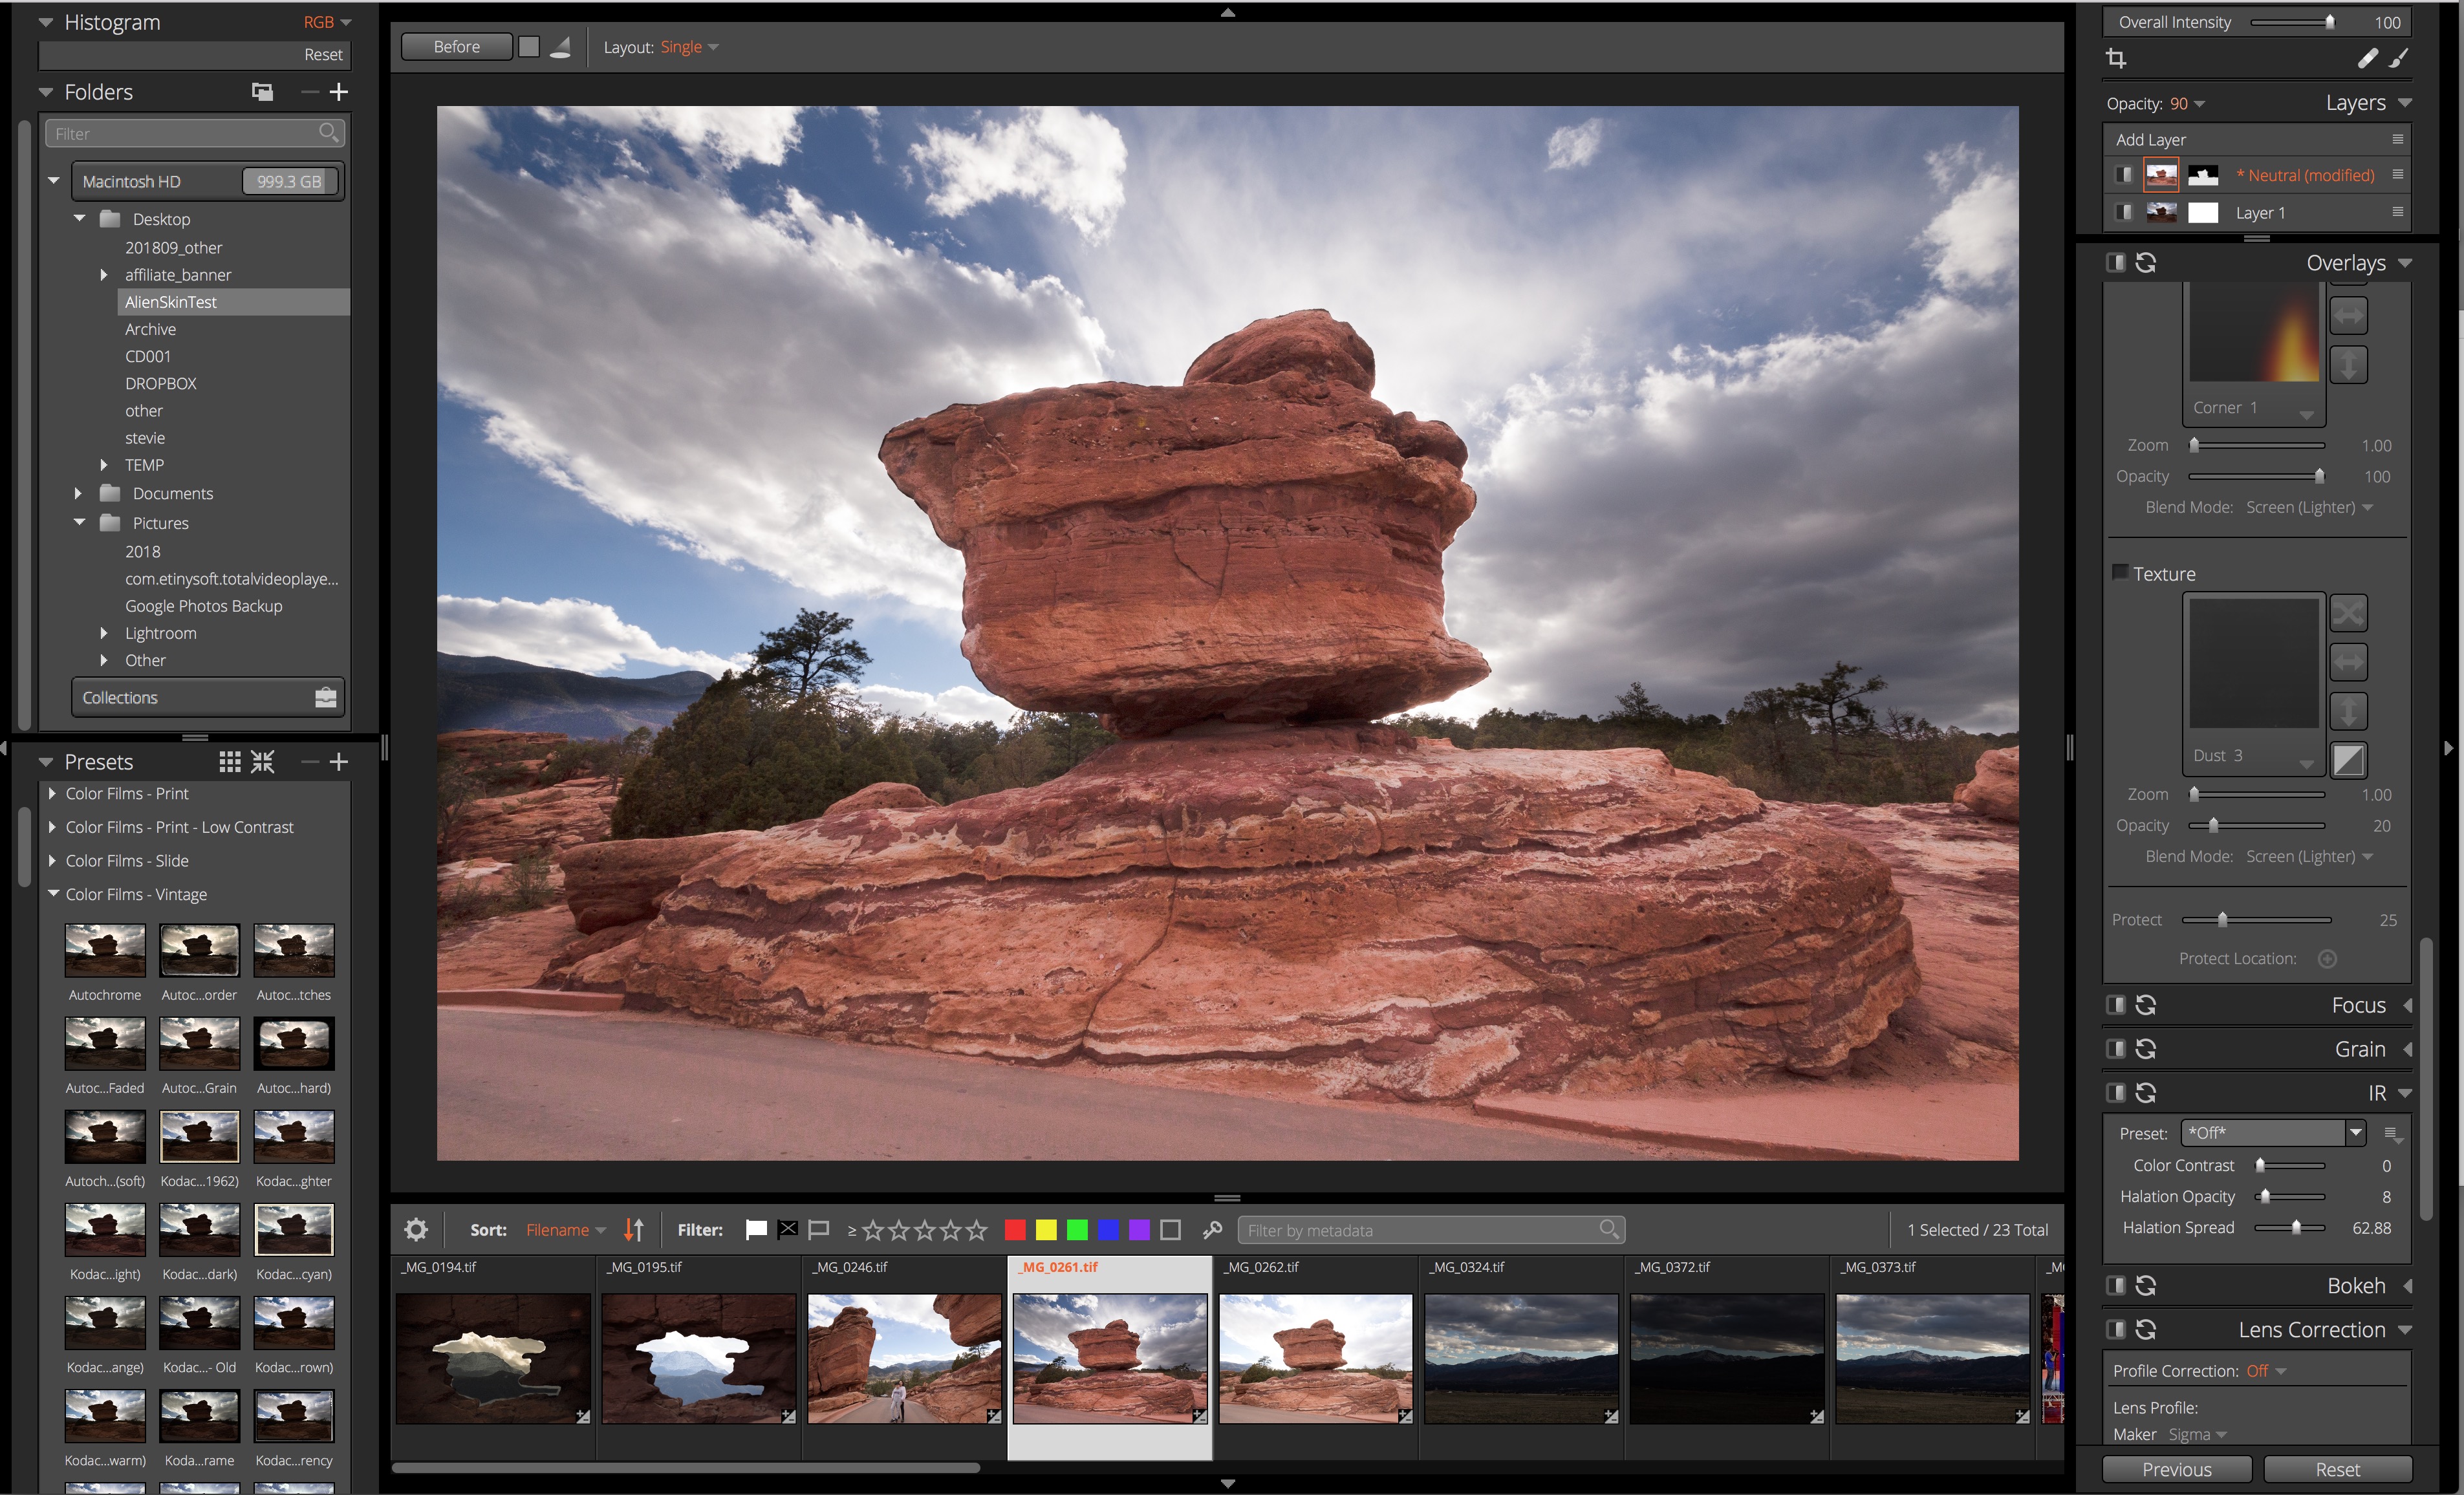
One of my photographs inside Exposure X3 after I applied a mask and lightened the rocks and road in the foreground. Photo © Andrew Darlow
There is definitely no shortage of image processing software on the market today (especially software that can convert RAW camera files in ways similar to Adobe Camera Raw and Adobe Photoshop Lightroom). It’s amazing how many companies are working to make the process faster and/or more feature-rich, which is great for anyone who works with photography or other artwork.
In this article, I’m going to highlight Alien Skin Software’s Exposure X3, a non-destructive RAW editor and organizer. I will include some videos that I found very helpful as I navigated the interface and worked on some of my images. I will also list some of the software’s features that really stood out in my mind. At the end of the article, I will talk a little about the next version of the software, which will be called Exposure X4.
Exposure X3 First Impressions
If you are a longtime Lightroom user like me, I think you will feel comfortable with many aspects of the user interface inside of Exposure X3. The software can be run in standalone mode, as a Plug-in inside of Photoshop, or as an external editor in Lightroom or a number of other applications. I chose to run it in standalone mode (by launching the application from my Applications folder), and it was up and running in just a few minutes. One of the things that took time for me to get my head around was that there is no catalog needed to use the editor, but it acts very similarly to Lightroom, which requires a catalog. This means that you don’t have to import images; you just navigate to them and start working.
I recommend just dragging and dropping a folder that has images into the main editing window, and it will appear under the Folders panel. Because of this, I highly recommend not dragging in any files directly from your desktop. Instead, place them in a folder first, since the application will be adding the files it needs to a new folder inside the folder that is holding your RAWs, JPGs, PSDs, etc.
Video Tutorials
Below is an excellent overview of Exposure X3 by photographer and host of the Candid Frame, Ibarionex Perello. I’ve always enjoyed Ibarionex’ interview style, and his vast knowledge of various editing tools makes this video a very useful resource.
Below is a very good 6 minute overview of how to edit using Exposure X3:
I also really liked this portrait-based tutorial of Exposure X3:
And for many more video training tutorials from Alien Skin Software, visit this page.
Standout Features
The main reason why I’m writing this article is because I was very impressed by many of the features that are inside the application. Here are just a few of them:
• Layers (Yes, layers!) This is at the top of the list because it allows layering similar to Photoshop, but nondestructively using a RAW file, meaning that you don’t have to create an 8- or 16-bit PSD or TIFF file to work in the application. This is a big deal because a 30 megapixel RAW file created by a modern DSLR or Mirrorless camera (to make the math easy), will become a 90MB TIFF in 8-bit and a 180MB TIFF file in 16 bit if you export it to work in another application. The Layers feature allow you to try different effects on different layers and use masking to adjust parts of an image. The main things you can’t do is have two different images on two separate layers. However, because RAW files can generally handle big exposure moves, you can place the same image on two layers, make adjustments to areas like skies or foregrounds on the top layer, and then mask out a section so that you get the best parts of each layer (or you can add the layer, then create a mask, then make the edits, as I did in the example I describe below. You can also add lighting effects to a layer, including radial or linear gradients. That makes turning the effect on or off just a simple button click.
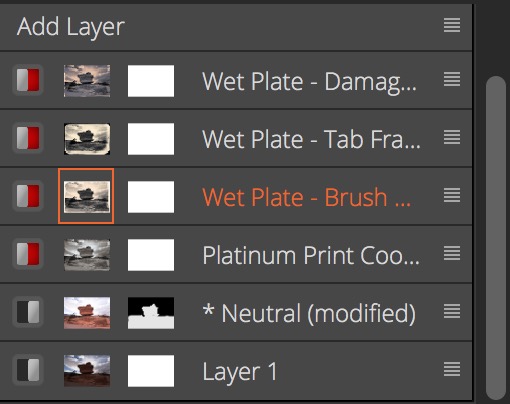
Exposure X3’s Layer Panel with my original image layer (bottom), a masked layer, and then a number of Presets shown separately in Layers (note that they are currently red, which means they are not activated).
• Color Filters Under the Color panel is the Color Filter tool. It’s a quick way to add toning just as if you were placing a translucent filter over your image. And when used on a layer, it’s particularly powerful. And I really like the tool tips that come up warning you, for example, that the mask needs to be inverted on a layer to see the effects of the color filter.
• Customizable Panels This one blew my mind! Imagine being able to set up your workspace much like you can do in Photoshop with its windows and panels. And with a simple click, a line will go through the name of the panel and it will be hidden from view.
• Overlays Exposure X3 has an Overlays panel that offers many creative options. The main sections are Border, Light Effect and Texture. I would think that in addition to photographers, designers (especially book cover artists) would love using these effects for a wide range of different uses. For my needs, I’m drawn to the border effects. I’ve purchased other software for hundreds of dollars just to be able to create different borders, and they were much more difficult to use. In Exposure X3. you just choose an image (I recommend creating a new layer for it), and start experimenting from scratch, right in the Overlays panel, or by using Presets that incorporate the Overlays.
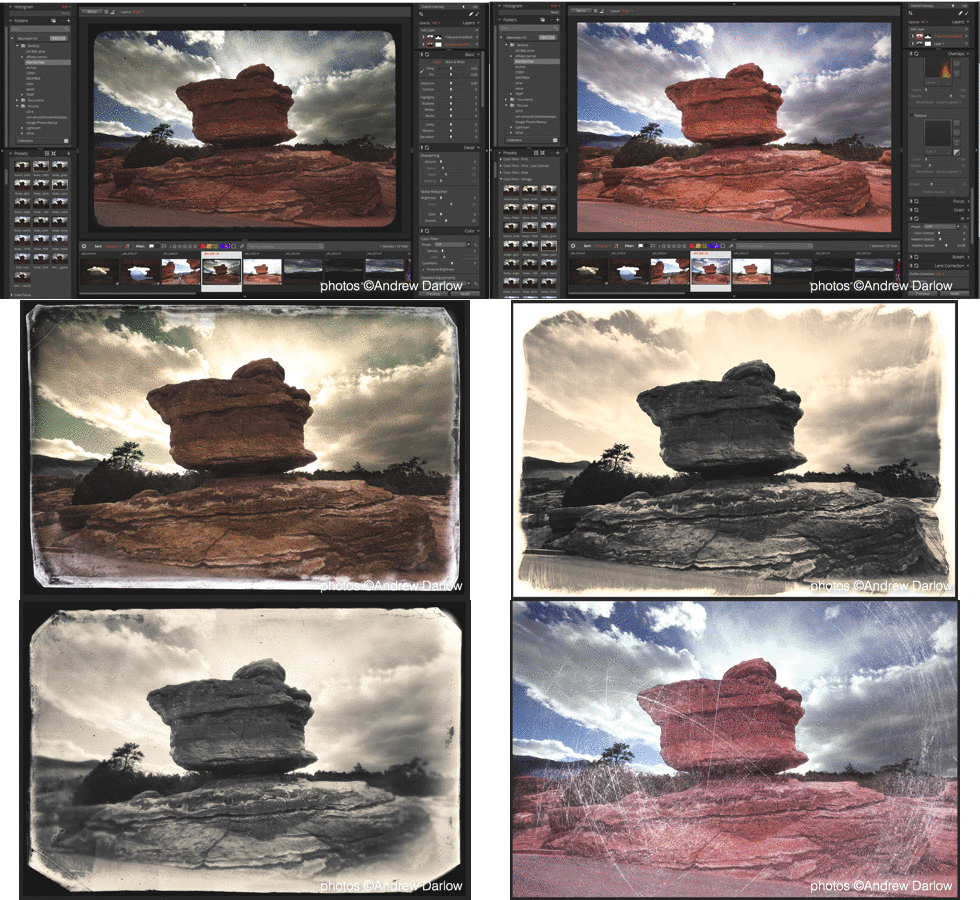
This 18 second slide show shows how my image started out (I chose a version in which the sky was well-exposed, so the rocks and road were too dark). I then created a new layer and a layer mask (the mask is shown in red). I then brightened the rock and road using the tools in the Basic panel. After that, I had fun creating the images you see above. They were extremely easy to make using Exposure X3’s built-in Presets.
• Presets, Presets and more Presets! Did I mention that there are a lot of Presets that come pre-loaded with Exposure X3? They are absolutely fantastic, and greatly increase the value of the software in my opinion. Many Presets emulate the look of black and white and color film types, and I got lost in them for quite a while. I should also note that in addition to exposure, color, etc., Presets can be saved with Exposure X3’s incredible Overlays (see above for more about Overlays). This is heaven for any designer or photographer who loves the look of distressed images like those that have scratches, or the look of platinum-palladium prints that have been created by hand coating papers or other substrates. Once you find a look that you like, you can tweak it and then save it as a Preset.
Another nice touch re: Presets is that each preset’s effect can be tested on a full screen image just by hovering over it. When you want to apply one or more presets to an image, I recommend clicking on the brush icon (located just above the Layers panel) and checking the box under Preset called “on a new layer” so that you can keep adding presets to your layer stack (see screen shot above under “Layers”. That allows you to have multiple Presets on multiple layers. You can turn them on and off, and you can dial the opacity of any of them to reduce the effect. This is similar to having multiple Virtual Copies, but without having to keep track of multiple images inside of the application. I should note that you also have the option of making Virtual Copies if you like.
There is another excellent way to see multiple presets applied to the same image and placed side-by-side (a maximum of 6 different presets can be shown in this way). It’s called Audition mode, and of course, there’s a video tutorial for it (see below) :
• IR Panel This is another fantastic option inside Exposure X3. IR stands for Infrared, and the tool emulates the glow that you often see when using infrared films. It’s ideal for both black and white and color portraits, or for any other photograph or drawing to which you’d like to add a “dream-like” feeling.
• Export Profiles A very nice “added touch” that the developers included in Exposure X3 is a collection of Export Presets for a wide variety of social media and popular photo portfolio sites like Zenfolio and SmugMug. These can be very helpful and save a lot of time and disk space when you need to export your work out to a folder before uploading to one of those services since the resolution and JPEG compression is already set for you (though you can edit the settings and save a new Preset).
Exposure X3 Pricing and 30 Day Free Trial
Alien Skin Exposure X3 is available in two configurations:
• Exposure X3 (US $149), and the
• Exposure X3 Bundle (US $199), which includes Exposure X3, Snap Art, and Blow Up. Blow Up is an incredible application that can enlarge your images quite a bit while retaining good detail and minimal or no visible artifacts. No software that upsizes your images is perfect, but if you give it a good quality image to start with, there’s a very good chance you will be impressed by the results once you dial in your settings. Snap Art is an application that focuses on transforming photos or other artwork in many different ways. For example, you can make a photo look like an oil painting, watercolor, etc. It normally sells for US $99 by itself. For more on Snap Art, visit this page.
If you’d like to try out Alien Skin Exposure X3 for free for 30 days, visit this page.
Exposure X4 Information and Upgrade
Alien Skin Software recently announced that a new version of Exposure named Exposure 4 will be coming soon. The company also announced that it will be sending free copies of Exposure X4 to anyone who purchased Exposure X3 (or the Exposure X3 Bundle) on or after July 1, 2018. If you purchased any version of Exposure before July 1, your current license code qualifies you for an upgrade price of $99.
Here is a list of new and/or updated features that are slated for Exposure X4 (Source: Alien Skin Software’s Blog)
- Improvements to Exposure’s RAW processing system.
- Perspective and keystone correction to minimize or eliminate optical distortion.
- Enhanced light effects that you can move and rotate freely anywhere in your image.
- Smart collections that automatically populate based on photo criteria that you choose.
- Faster file exporting and launch times.
- Lightroom migration tool that brings your Lightroom organizational metadata over into Exposure.
- Monitored folders that support tethered shooting workflows.
- New printing presets.
- Support for new cameras and lenses.
- Expanded workflow options for image copying and exporting.
Conclusion
Overall, I am extremely impressed by Alien Skin Software’s Exposure X3 application and look forward to what’s coming in Exposure X4. I can definitely see people using this application as a replacement for other RAW editors and organizers. Will I be giving up Lightroom? No (at least not for now). I currently still prefer to use Lightroom for the vast majority of my culling, editing, keywording and printing, especially since I’ve been using it for over five years, and my main catalog has over 400,000 images. But I will definitely turn to Exposure X3 when I want to edit images using the application’s powerful Layers panel, or when I want to explore the application’s incredible Preset and Overlay options. I can see a lot of Lightroom users doing the same.
If you’d like to try out Alien Skin Exposure X3 for free for 30 days, visit this page.
——-
(Full Disclosure: Apart from being provided a license code for the Exposure X3 Bundle, I was not compensated in any way for writing this article. I plan to purchase Exposure X4 when it is released, and look forward to sharing my experiences with it. Please note that this article contains affiliate links to the Alien Skin software site, which means that I may be compensated if a purchase is made, but pricing will be the same as if you had navigated directly to Alien Skin Software’s site. If you would prefer not to use my links, just visit your favorite search engine and type in: “Alien Skin Software Exposure X3”

