
Creative Blur Step by Step Photoshop Tutorial
Creative Blur Photoshop Tutorial (Works in all versions of Photoshop since Photoshop CS4)
Images and Text by Andrew Darlow
Creative Blur has been used from the very early days of photography both intentionally to create a certain look, and because of the inherent characteristics of lenses, apertures and cameras with swings and tilts, such as 4×5 and 8×10 view cameras.
Today we have many options for using blur creatively in-camera and in post production. A popular and innovative family of lenses called Lensbabies allows for creative blur in-camera without the need for any software. And a software application/plug-in from Alien Skin Software called Exposure (see my hands-on review HERE) has a tool called “Bokeh” that allows you to take creative blur to a whole new level.
In this tutorial, I’ll show you how you can quickly and easily transform the look of a photo or illustration in Photoshop by introducing blur on various sections of the image. Photoshop CS4 are recommended, but you can use other blur tools and other applications to create similar effects.
STEP 1: Open your image and duplicate the Background Layer by dragging the background layer onto the copy layer icon at the bottom of the Layer palette, or by selecting the Background layer and choosing Layer>Duplicate Layer> then name the layer.
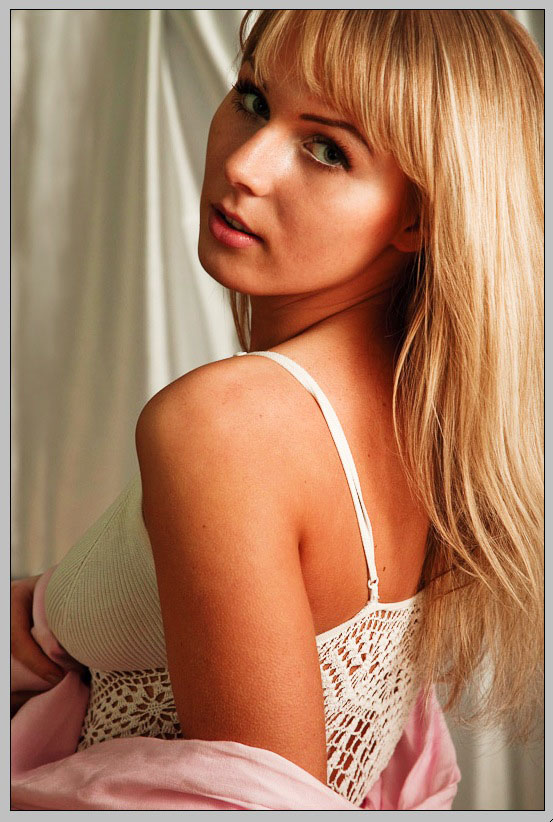
Fig. 1: Original Photo, which has been moderately sharpened overall (photo © Andrew Darlow)
STEP 2: Select the Background copy layer. It’s a good idea to rename it to something like “Blur Layer”. Then apply a blur over the entire image using Filter>Blur>Lens Blur. There are many variables and options available in this tool. I used the options shown in Fig 2.
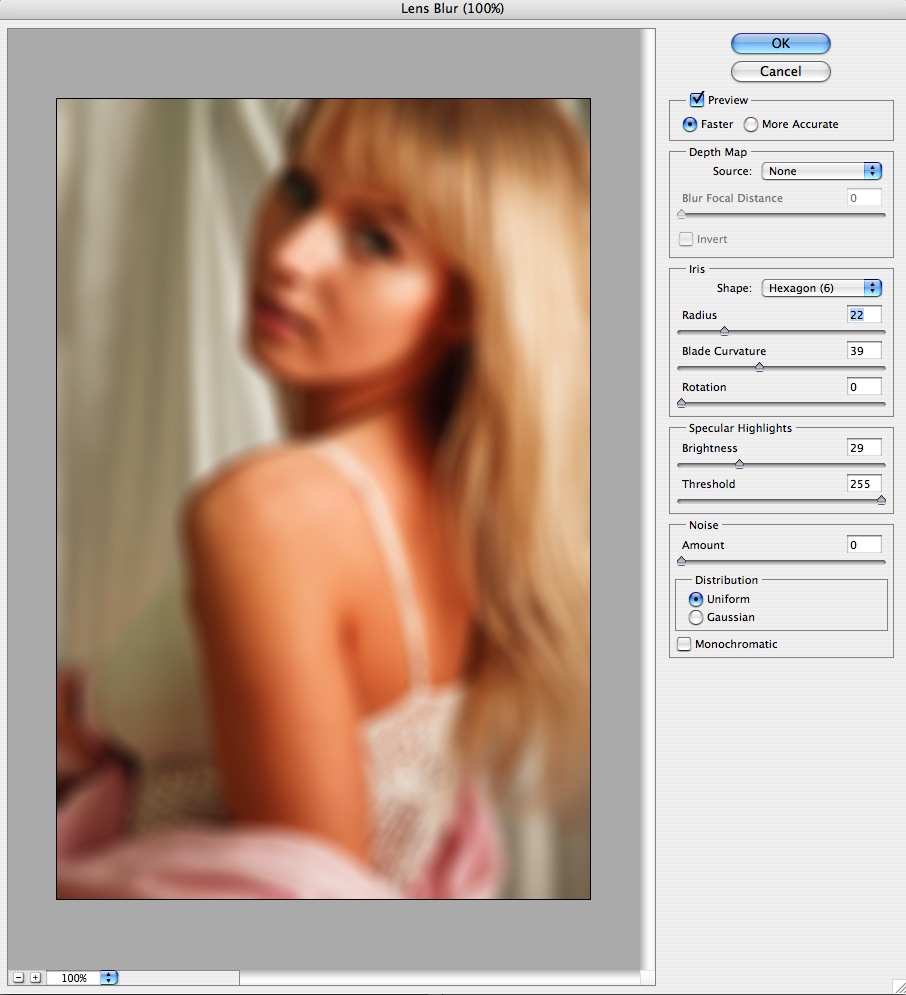
Fig. 2: Lens Blur tool in action (photo © Andrew Darlow)
STEP 3: While the top Layer is selected, create a Layer mask by Option (PC: Alt) Clicking on the Layer Mask icon (Fig. 3). That will conceal the blur and allow you to paint it in selectively.
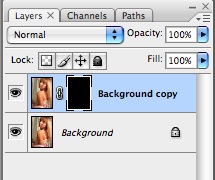
Fig. 3: Duplicated layer with Layer mask
STEP 4: Select the Layer Mask icon and choose a shade of gray or pure white depending on the strength of the blur that you’d like. Then paint in the shade of white or gray you choose using a soft brush. About 100-300 pixels in size and 0 hardness works well for medium-resolution images (about 8-10 megapixel camera images, or 24-30MB in 8-bit RGB, which is 48-60MB in 16-bit RGB). Experiment to determine the best brush size for your images. I like to use the bracket keys “[ ]” to make the brush size larger and smaller as I work because it is fast. The mask that I created and edited can be seen in Fig 4.
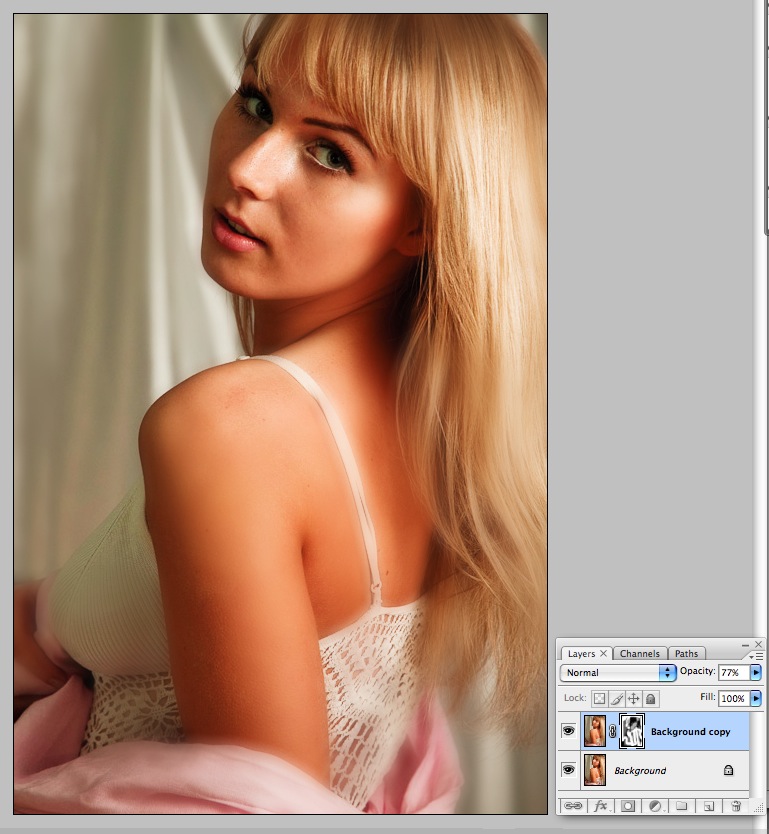
Fig 4: The painted layer mask can be seen in the top of the layers palette, and the final image is shown to the left. (photo © Andrew Darlow)
STEP 5: Examine your work and switch to black in your color picker to paint back sharpness, or switch to another shade to make the blur effect stronger or weaker in any area of your image.