
What You Need to Know Before Updating to MacOS Catalina 10.15
The newly renovated Apple Store, 5th Ave, New York City 9/21/2019 © Andrew Darlow
I chose the photo above because it fits in with the topic I’m discussing today. I photographed it with an iPhone 11 Pro using the Panoramic mode. Click on the image to view it about four times larger (I did some perspective correction in Photoshop to straighten the buildings, and boosted the saturation a bit).
WHY I’M RINGING THE ALARM BELLS ABOUT 10.15 CATALINA
There’s a new operating system, named macOS Catalina (10.15), coming very soon (potentially as early as October 4, 2019 according to This Article) to millions of Apple Macintosh users with computers that were produced recently enough (or that have sufficient hardware specs) to run it (this Wikipedia article has a list of the specific models). Normally, I would not be sounding any alarm bells about this, but this is a different situation. Many people get into the habit of just clicking on “update” or have their computers set to automatically update to the latest operating system. But I would be very careful about doing that this time. The reason is that macOS Catalina (10.15) will only run 64-bit apps, and there is a VERY GOOD CHANCE that some or many of the apps you have on your Mac are 32-bit apps. Those applications will stop working if you upgrade.
SO WHAT SHOULD YOU DO?
1. The main thing to do is to not automatically approve the upgrade if you are invited via a pop-up message to do so until you are ready. I personally will be waiting at least a few months on my main machine (maybe even a year or more) to upgrade.
2. The next thing you can do is turn off all automatic updates for your current Operating System. For example, I am on macOS Mojave (10.14), so I went to System Preferences>Software Update (located in the 3rd Row in the default configuration), and made sure that “Automatically keep my Mac up to date” was unchecked. See below for what that screen looks like. I then clicked on the “Advanced” button and kept “check for updates” checked, but unchecked everything else. With all that said, I would set a reminder to see what updates are available for your computer if you turn off the “Install system data files and security updates.” Checking that item Will Not update your software to a new operating system like macOS Catalina.
3. If and when you do upgrade, I recommend having two backups of your existing system (a Time Machine backup plus a Clone of your system on an external drive).
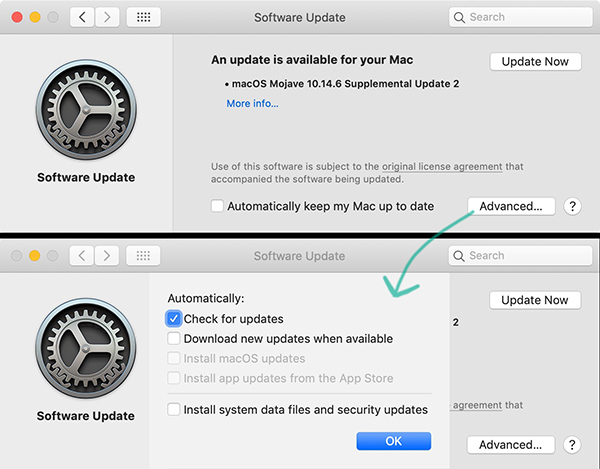
Software update screenshots
WHAT IF YOU ARE NOT RUNNING MOJAVE (10.4)?
If you are not running Mojave (Sierra (10.12) or High Sierra (10.3), for example), it’s a bit more complicated. You can find it Software Update under “About this Mac” and then “Software Update”. You can also read about how to upgrade (or avoid turning on auto updates) on THIS PAGE.
RELATED ARTICLES & PODCASTS
On a related note, This is An Excellent Article with a comprehensive overview of what’s in macOS Catalina, and how many things will be changing on your Mac (bye bye iTunes, for example!).
And I thought you may like to listen to This Episode of Connected, one of my favorite podcasts about all things related to Apple Computer, the Mac and iOS (you can even adjust the speed of the playback). If you’d like to cut to the chase, you can skip to 52:32 (you can move the playhead back and forth near the top of the page) to just listen to the section about macOS Catalina, including their suggestion to install an app called Go64 (You Can Find It Here) that will quickly tell you which of your applications on your Mac are 32 vs 64 bit. There are other items called “Kernel Extensions” that are changing, which is quite geeky, but it’s an important change.
If you listen to the beginning of the show, you will hear that the co-founders of the company who produces the podcast (Relay FM) recently helped raise over $300,000 for childhood cancer research by doing a focused fundraising campaign for St. Jude Children’s Research Hospital. Relay FM has more than 20 shows, and their hosts and listeners were very generous in their support. I learned that no family has to pay for the treatment that they receive at St. Jude Children’s Hospital, and I was a bit shocked to learn that the average treatment for a child with leukemia is about $200,000.
I also learned from doing some online research that in the 1950s, nearly all children with leukemia passed away, but today, the survival rate is about 75% thanks to the work of research hospitals like St. Jude. Here’s a link to a six hour “podcast-a-thon” that helped them a lot to reach that goal. They are the same people that you will hear on the podcast and their names are Stephen Hackett and Myke Hurley. Stephen Hackett’s son was a patient at St. Jude’s and you can read about his family’s story HERE. You will also hear a gentleman on the podcast named Federico Viticci, who runs a fantastic site called MacStories.net.
MY 40 DAY EMAIL CHALLENGE IS IN FULL GEAR!
If you are not currently receiving my preferred email news and tips, I welcome you to subscribe HERE. You will instantly receive an e-book with 25 pages from my award-winning photo tips book, Focus & Filter, as well as some Lightroom videos. I’m also in the middle of a 40 Day Challenge in which I’ve been sharing tips and advice on many topics, including inkjet printing, portrait photography, travel and much more. I hope to see you there!
Alien Skin Software Exposure X4 and X4.5 Overview and Link to Free Trial

It’s truly an amazing time to be a photographer. There is no shortage of incredible tools to edit just about any scanned or digitally-captured image, whether it be a Raw file or many other file types. In September of 2018 I posted an overview of Alien Skin Exposure X3 as well as some of the new features that were coming to Exposure X4. You can find that article here. Recently, the company released Exposure X4.
I was impressed then with the speed and feature set of Exposure X3, and I’m even more impressed now with Exposure X4.5. There are many effects in the application/plug-in that just can’t be found on other non-destructive image editors.
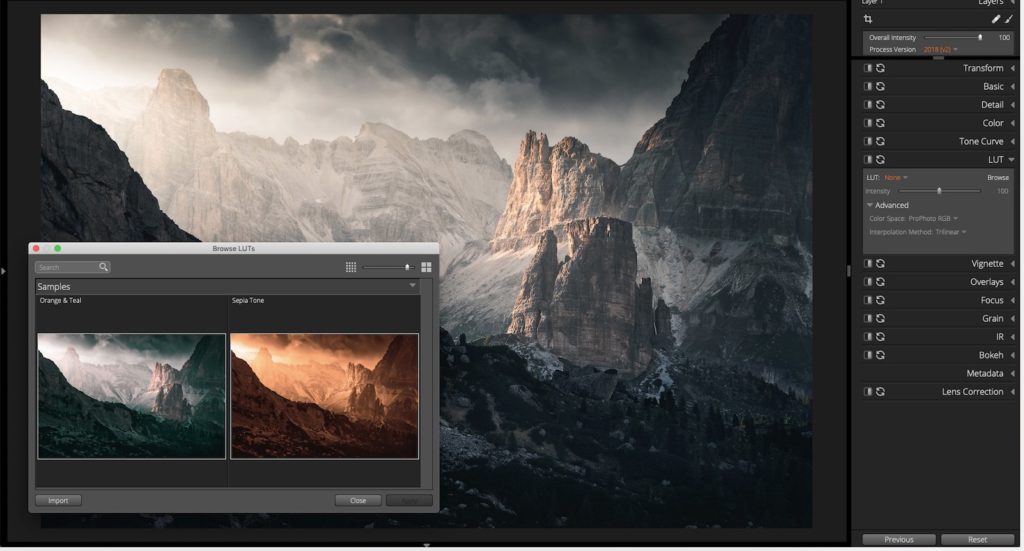
A screenshot showing an image with two LUT (Look up Table) options. LUTs are a new feature in Exposure X4.5. Image courtesy Alien Skin Software
Some of the things that stand out for me in Exposure X4 and X4.5 are as follows:
• LUTs: (short for Look-Up Tables) are small files that allow you to apply certain “looks” or color grading non-destructively to your images inside of Exposure X4. This is an excellent article on the topic that shows a number of examples, with a link to some free downloadable LUTs from Lutify.me.
• Preset thumbnails: (allow you to see and apply many different effects, such as film simulations), are able to be resized by dragging the panel where they are located. This is extremely helpful when choosing different looks. Like all of the panels, you can even customize where they are located.
• Hovering effect for presets is very fast (I tested it on a 2013 MacBook Pro with an i7 Processor). This feature allows you to hover your mouse over a preset, and the image in the center window will temporarily apply that preset, making it very fast and easy to test out different looks.
• The “IR” tools are nothing short of amazing. This tool allows you to create different types of “glow effects” that simulate the look of infrared (or you can use them to just add a softer look) in your images. As they say, you have to see it to believe it!
• The Bokeh tool (used to create creative blur effects) could be an application all by itself. It’s just mind-blowing.
• Tethered Shooting and Non-destructive Layers: Here is a link to a tutorial that shows some of what Exposure X4.5 can do, especially when put in the hands of a skilled image maker:
• User Configurable Keyboard Shortcuts, including one option that makes it easier for Lightroom users to either use Exposure X4.5 as an additional editing tool (standalone or as a plug-in), or for those who want to make the transition from Lightroom Classic to Alien Skin Exposure X4.5.
And here are a few of the newest features that have been added to Exposure X4.5 (from the company’s press materials)
- LUT (Look up Table) Support;
- Additional freely moveable light leak overlays, including the new categories of Lens Flare and Haze;
- Collection membership now appears the Metadata panel, enabling photographers to see a full list of the collections a photo belongs to
- Support for additional cameras and lenses from a number of manufacturers:
- Fujifilm
- Leica
- Panasonic
- Nikon
- Sony
- Olympus
- Canon
- DJI
- User-requested workflow refinements that include new photo sizing options when exporting, new keyboard shortcuts;
- Configurable keyboard shortcuts (I also mentioned this above, but here’s a link to an excellent overview of the feature); and
- Copy Photos from Card tool adds visual browsing and selection of files to be copied.
MODIFYING KEYBOARD SHORTCUTS – A Real World Example
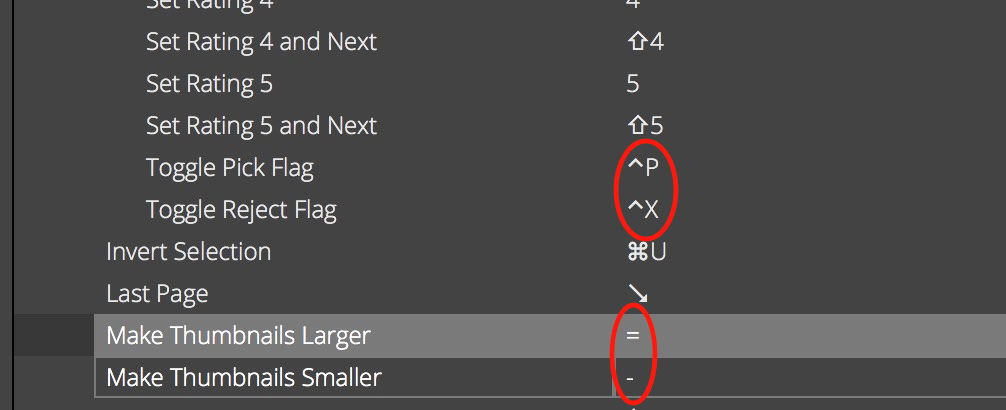
I try to use keyboard shortcuts whenever possible to save time, and two that I constantly use in Lightroom are the “-” and “=” keys to make thumbnails larger or smaller in the Library Module. With that in mind, I was able to change the default keyboard shortcut in Exposure X4.5 for those keys (they were previously assigned to “Toggle Pick Flag” and “Toggle Reject Flag”. Now the keyboard shortcuts match between both applications.
NEW VISUAL BROWSING OPTION FOR CARD IMPORTS
I found the new visual browsing option when copying photos from a card to be very well designed and easy to use. The thumbnails can be made quite large (almost full screen if you like), which is great for quickly making selections. Here’s what it looks like (click on image to see it larger):
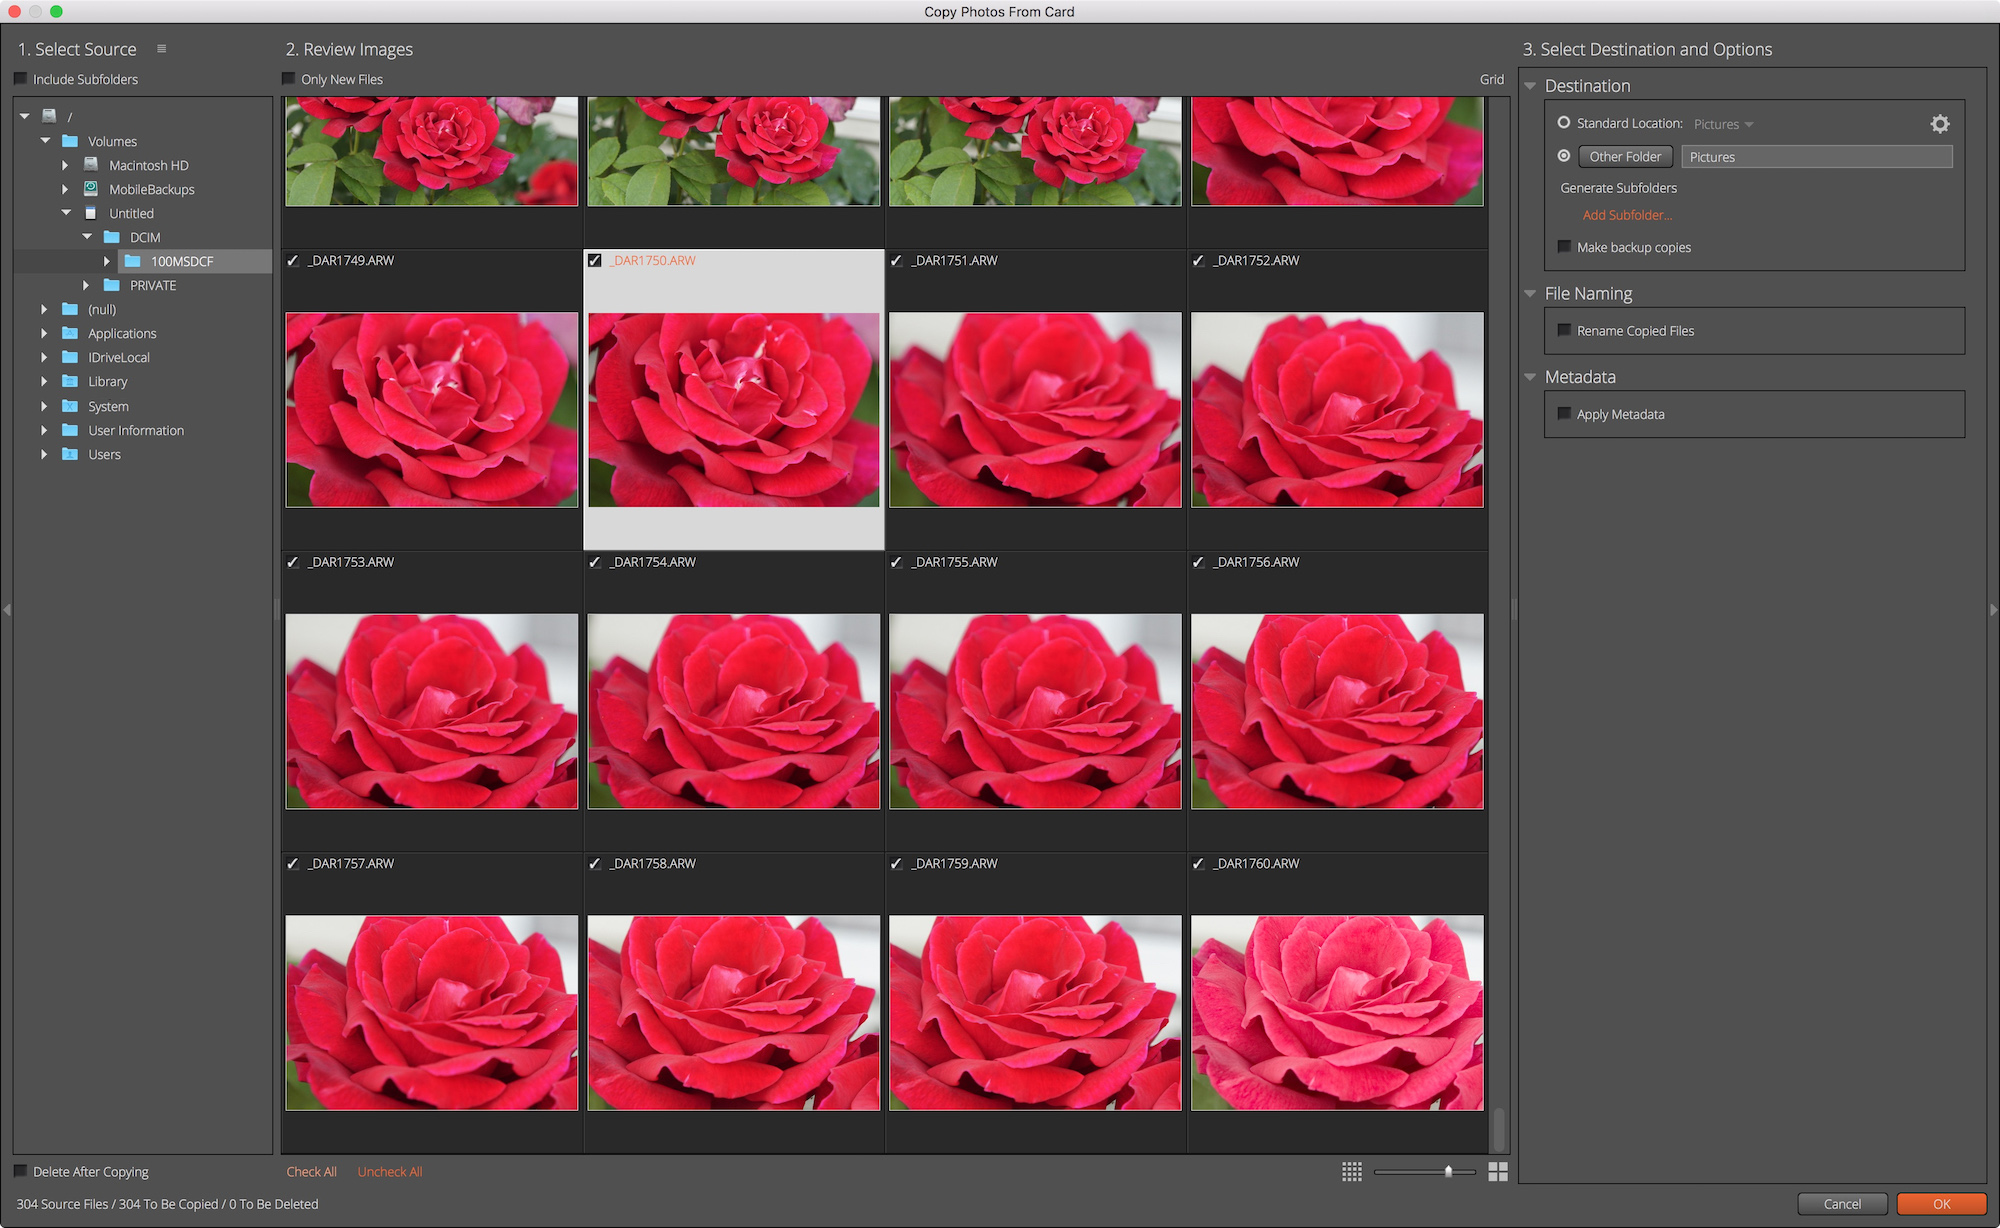
The card import dialog box in Alien Skin Exposure X4.5
TUTORIALS
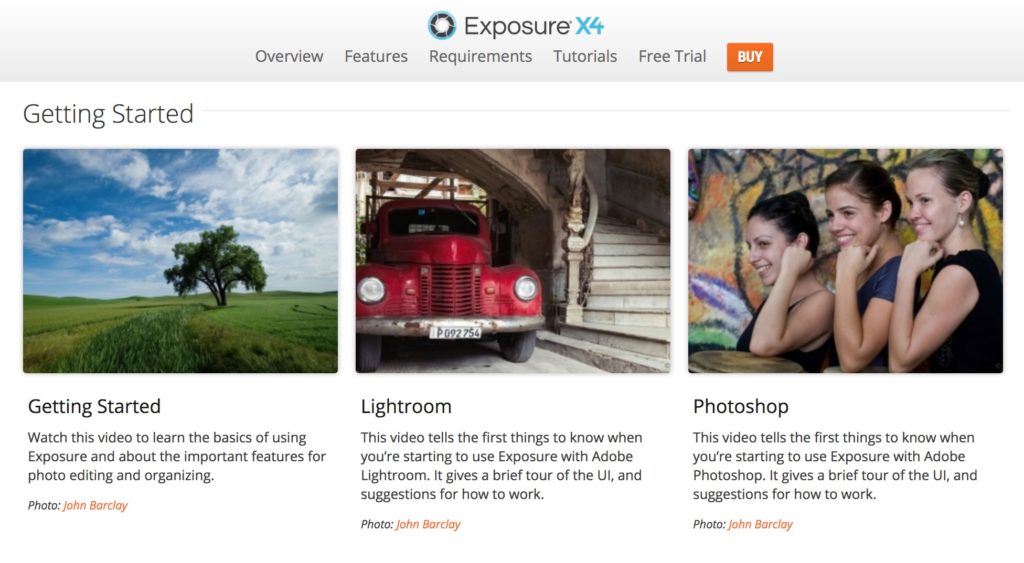
A screenshot from the tutorials page for Exposure X4.5
Alien Skin Software has an excellent collection of tutorials to help anyone get started or hone their skills with their applications. Here is a link to the tutorial page for Exposure X4.5, and here is a link to their YouTube channel.
I would be remiss not to include at at least one screen shot from my testing. I praised this feature in my review of Alien Skin Exposure X3, but this tool never ceases to amaze me. It’s the Overlays panel, and if you like the idea of being able to create a wide variety of custom borders for your images, I would reserve a few hours for yourself to dig in and enjoy!
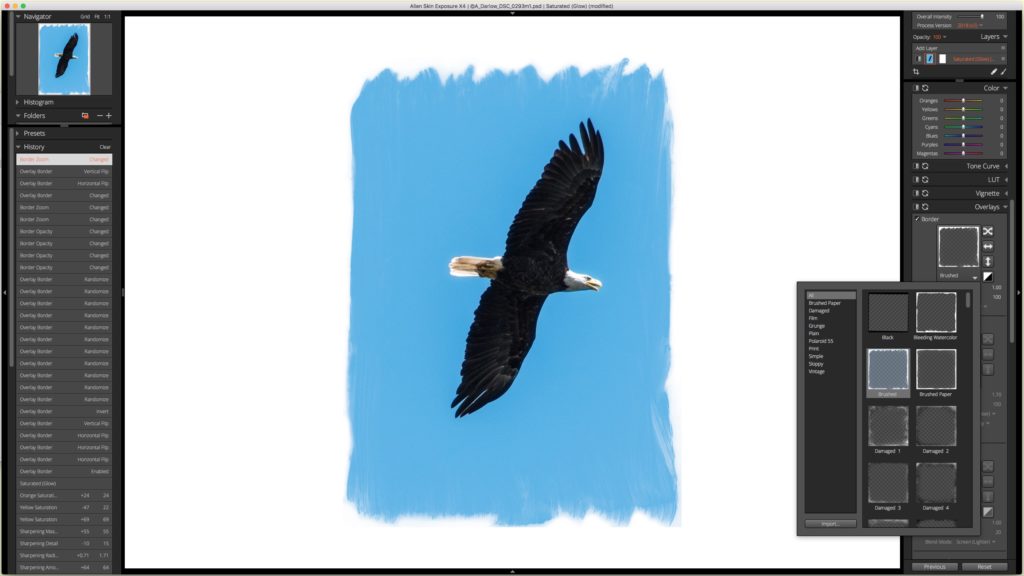
One of my photos being edited in the Overlays panel. Photo © Andrew Darlow
EXPOSURE X4.5 PRICING and 30 DAY FREE TRIAL
Alien Skin Exposure X4.5 is free to all owners of Exposure X4, and is available in two configurations for Mac and Windows OS:
• Exposure X4 (US $119). I should note that this is a $30 savings compared with the previous price of Exposure X3.
• Exposure X4 Bundle (US $149), a $50 savings compared with the previous Exposure X3 bundle. It includes Exposure X4, Snap Art, and Blow Up. As I noted in my other article, Blow Up is an amazing application that can enlarge your images quite a bit while retaining good detail and minimal or no visible artifacts. Snap Art’s forte is transforming photos or other artwork in many different ways. Effects include many different looks, including pastel, oil painting and watercolor. For more on Snap Art, visit this page, or see the the video below:
and here is a quick video overview of Exposure X4:
• Re: upgrades, the cost to upgrade from previous versions of Exposure to Exposure X4.5 is $79. The company also frequently releases updates to support the raw files of new cameras, make bug fixes, etc.
I highly recommend downloading a copy of Alien Skin Exposure X4.5 and giving it a test drive. Even if you are happy with your current Raw processing app or other image editor, you may find that some of the tools are well worth the cost of the application. If you’d like to try out Exposure X4.5 for free for 30 days, visit this page.
Luminar 3 with Libraries Overview and Special Offer
There is no shortage of Raw photo processing software that can be used to convert your images from Raw to many other formats (TIFF, PSD, JPG, etc.). Examples include Adobe Lightroom, Alien Skin Exposure X4 and Phase One Capture One Pro 12. Most photo processors also have powerful editing capabilities. And one thing I should note is that even if you don’t take photos using the Raw format that your camera may offer as an option, these programs work very well with other formats (even JPGs from smartphones). At their core, most of these programs are what’s known as “non-destructive editors,” which means that no matter what adjustments you make inside the software, you can easily get back to the original version of your images if you like, instead of having to make multiple copies before you begin editing. Lightroom has been my “go-to” application for years, but I’m always interested in seeing what else is out there.
That brings me to an impressive Raw photo processing application called Luminar 3 with Libraries. For the first time, the folks at Skylum have added a Library-based workflow to their application. I recently saw a live demo of the software, and I was very impressed by the speed at which viewing and editing can be done. I also like how easy they make seeing “before and after” effects with the slide of a bar across the screen. They also have some “AI” features and a sky enhancer that can dramatically improve the look of photos very quickly.
Currently, the DAM (Digital Asset Management) and other tools are not nearly as robust as in Lightroom (for example, there is no keyword support and no ability to create virtual copies). However, the folks at Skylum have been working to implement many more features, and to get an idea about what’s in store for the application in 2019 (which includes keywords and virtual copies), visit this page to see their planned roadmap.
I think that the video below by Trey Ratcliff can help you to get a good feel for how Luminar 3 with Libraries is different from other editors, and what its like working with the new Libraries features inside of the application:
For now, I personally will mostly be using Luminar 3 with Libraries to do edits that I feel can be done better (or much faster) than what I can do in Lightroom or another application. Or, I may process specific projects through the application so that I can quickly rate and edit a large number of images. For files that I would like to then manage in Lightroom, I will export my files from Luminar 3 with Libraries to a folder and then import them into Lightroom. If you keep your files managed with a non-destructive editor like Luminar 3 with Libraries or Lightroom, there’s no need to export your files until you need them for another purpose, like sending them to a photo lab for printing.
PRICING, AVAILABILITY AND A SPECIAL OFFER
Pricing for Luminar 3 with Libraries is currently $59 (normally $69). Also, you can save an additional $10 with promo code: IMAGINGBUFFET (look for the link to “Enter Promotional Code” at checkout). Also, unlike many other software companies’ licenses, one license covers 5 Macs or PCs (check their terms for specific details). Satisfaction is also guaranteed, with a 45 Day money back policy. If you currently own Luminar 2018, you are able to upgrade to Luminar 3 with Libraries for no fee. Also check the website for other possible discount offers if you own other products from Skylum Software.
Also, when you purchase Luminar 3 with Libraries by 12/19/2018 at 5AM PST, you will receive all of the bonuses listed below (if you are thinking of taking a trip to Iceland and like the tours offered by Iceland Photo Tours, that bonus alone is very attractive):
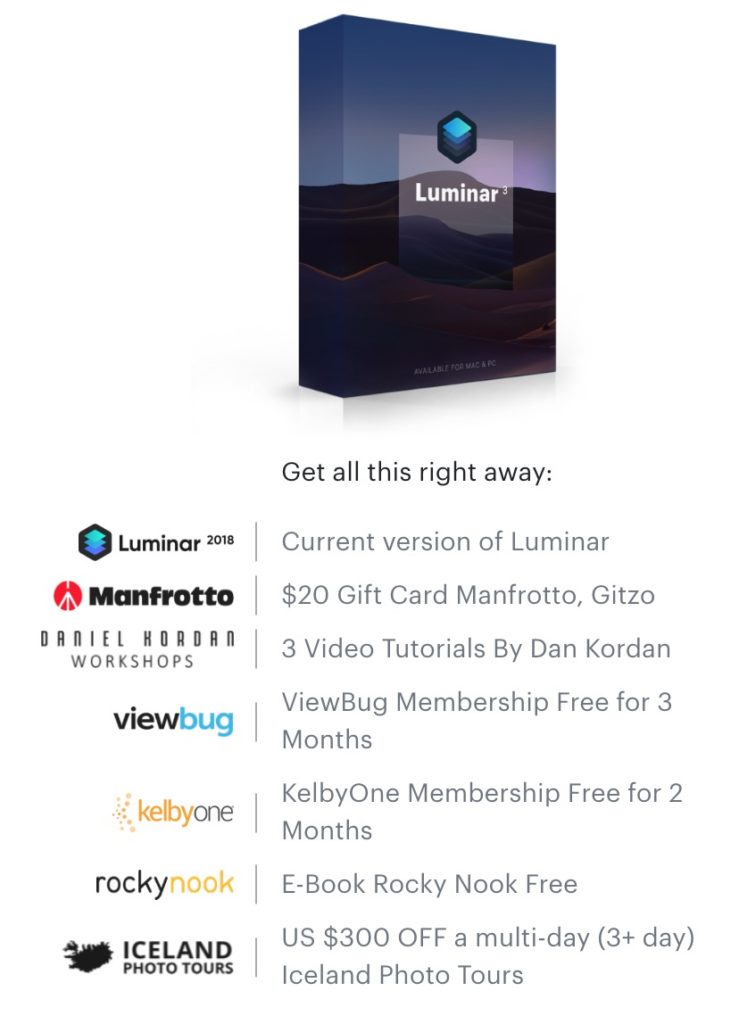
For more information and to claim this very special offer, visit THIS PAGE.
I also have two more “Holiday Specials” to share:
1. The folks over at PhotoshopCAFE have a 15% coupon on everything in their store for at least the next four days (the promo code is 5days2018). To see all of the amazing video training they offer, visit this page. I just purchased their Making Movies in Photoshop Video Training. You can find that title HERE.
2. A few years ago, I created a GoFundMe page for my son Tyler’s intensive Autism treatment in Massachusetts. The results have been fantastic (what we learned we use every day, and Tyler has made great progress). As part of the rewards that were offered, two were consulting packages with me so that I can help others with their workflow, camera setup, custom printer profiles, printing (on their own printer or by using an outside service). I’ve decided to make those two packages available again for a limited time (until 12/31/2018). You will be saving $219 off my standard 6 hr rate ($975 for 6 hrs), and $255 off my standard 10 hr rate ($1,495 for 10 hrs). When I sent the offer to my newsletter subscribers, I was asked if I would create a special offer for consulting sessions under six hours, so I am now also offering a two-hour laser-focused session for just $350 (each additional hour is just $162.50; the same as the hourly rate of my 6-hr special consulting special).
To see if we are a good fit for each other, just reserve a no obligation 15 minute Strategy Session with me HERE, and if we decide that we’d like to work together, you can then choose from either consulting option. I’m also happy to create gift certificates for any of my consulting packages (they are 100% refundable if the person who you give the consulting to decides it’s not right for them after we speak for about 15 minutes).
That’s it for now! I wish you and yours a wonderful Holiday Season, and please don’t forget to back up your precious photos and videos.
All the best,
-Andrew
(Full disclosure: I have an affiliate relationship with Skylum Software (makers of Luminar 3 with Libraries), so I will receive a commission if you use my promo code or links above. However, your pricing before any promotional discounts is the same as if you visit their website directly. I have no affiliate relationship with any of the other companies listed above).